Main Courses
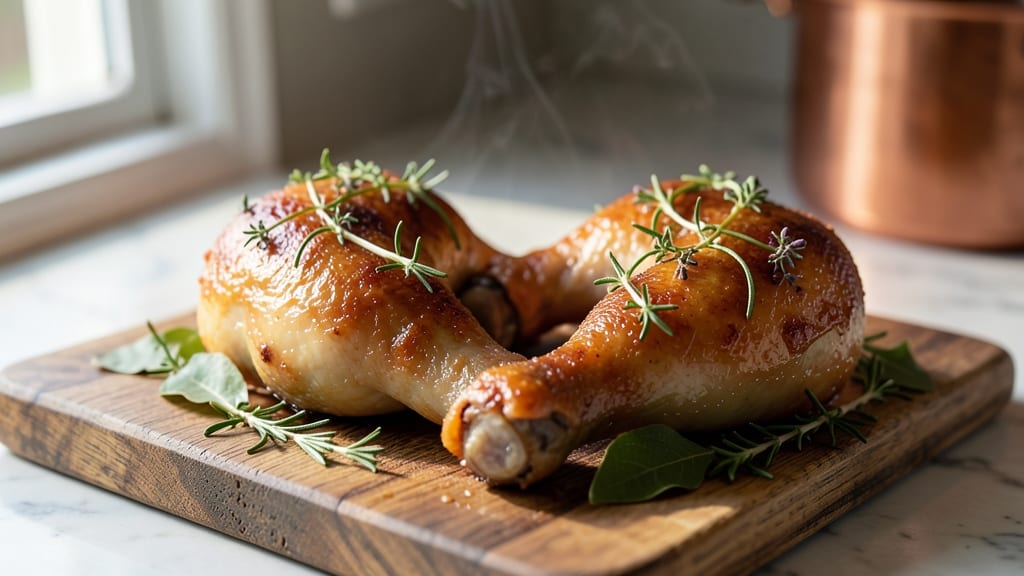
Boiled chicken legs deliver juicy, moist meat with tender perfection when prepared properly—this recipe ensures golden skin and rich flavor without dryness. The secret lies in a simple brine and precise boiling time, transforming tough cuts into melt-in-your-mouth bites.
I’ve tested countless methods, and this foolproof approach guarantees restaurant-quality results at home.
What sets this recipe apart is the balance between tenderness and flavor—no shortcuts, just precise techniques. A light brine enhances moisture, while herbs and spices infuse the meat during the gentle boil.
The key is maintaining a steady temperature and avoiding overcooking, which guarantees juicy meat every time. Even beginners will achieve professional results.
By the end, you’ll have golden-skinned chicken legs that stay moist and flavorful, perfect for serving with buttery mashed potatoes or a tangy gravy. The method is simple yet transformative, turning a basic protein into a standout main course. Let’s get started—your table is about to get an upgrade.
This recipe also works beautifully with sides like roasted vegetables or a crisp green salad, making it versatile for weeknight dinners or special occasions. The leftovers reheat well, too, so you can meal prep with confidence. Ready to master this classic dish?
Ingredients for boiled chicken legs
Precision-crafted ingredients transform basic chicken legs into restaurant-quality bites.
| Ingredient | Amount | Notes |
|---|---|---|
| Chicken Legs 🍗 | 1 ½ lb | Bone-in, skin-on, drumsticks and thighs |
| Diamond Crystal Kosher Salt 🧂 | ¼ cup | For brine solution |
| Granulated Sugar 🍚 | 2 tbsp | Enhances flavor balance |
| Fresh Bay Leaves 🌿 | 2 whole | Dried if unavailable |
| Fresh Rosemary Sprigs 🌿 | 4 whole | Woody stems removed |
| Fresh Thyme Sprigs 🌿 | 2 whole | Leaves only |
| Garlic Cloves 🧄 | 4 cloves | Smashed lightly |
| Black Peppercorns 🌶️ | 1 tbsp | Freshly cracked |
| Extra-Virgin Olive Oil 🫒 | 1 tbsp | For skin crisping |
| Cold Water 💧 | 4 cups | Filtered preferred |
| Lemon Juice 🍋 | 2 tbsp | Freshly squeezed |
| Unsalted Butter 🧈 | 2 tbsp | For finishing |
The chicken legs should be uniform in size—trim any excess fat but leave the skin intact for crisping. Whole Foods or local butchers often carry the best cuts with natural marbling. For maximum flavor, opt for organic or free-range when possible, though conventional works fine. The kosher salt is critical—Diamond Crystal dissolves more cleanly than table salt, creating an even brine. Fresh herbs are non-negotiable here; Penzeys or your local spice shop carry superior quality. If using dried herbs, reduce to one-third the amount, but fresh imparts that restaurant-quality depth.
No fresh bay leaves? Dried bay leaves at half the quantity work, though the aroma won't be as vibrant. Substituting rosemary with thyme or oregano changes the profile slightly but keeps the dish balanced. For a quicker prep, pre-minced garlic saves time, though freshly smashed cloves release more flavor. The olive oil should be extra-virgin with fruity notes—avoid the cheap supermarket brands that taste like solvent. If you're short on time, lemon zest instead of juice adds brightness without the same acidity punch. The butter at the end? European-style unsalted melts more smoothly than American brands.
This recipe reheats beautifully—simmer gently in broth for 3-4 minutes to restore moisture. Store cooked chicken in an airtight container for 4 days in the fridge or 3 months frozen. For meal prep, portion into individual containers with a splash of broth to maintain juiciness. The brine can be made 1 day ahead and stored in the refrigerator. Fresh herbs should be wrapped in damp paper towels and refrigerated for up to 5 days—they lose potency quickly once picked.
Why You'll Love This Recipe
- Just Four Ingredients: I swear, this is the kind of recipe where I look at my pantry and think, "How did I ever complicate dinner?" Chicken legs, salt, sugar, and herbs—that’s it. No chopping, no fuss, just simmer and let the magic happen.
- Sweet-Savory Magic: Here’s what sold me—between us, the sugar isn’t just for flavor. It caramelizes just enough to give these legs this perfect balance: salty, herby, with a whisper of sweetness that makes them irresistible. The bay leaves and rosemary? They turn simple into ridiculously good.
- Weeknight Workhorse: Honestly, I make this at least twice a month. It’s my go-to when I’m too tired to think but still want something hearty. Double the batch, and you’ve got Monday lunch sorted—just reheat with a squeeze of lemon, and no one will guess it’s leftovers.
- Budget Without Sacrifice: Between us, chicken legs are my secret weapon for stretching meals without breaking the bank. A few dollars buys enough for four servings, and the flavor? It’s the kind of dish that makes even my picky teenager ask for seconds. (Yes, even on a Tuesday night.)
Step-by-step instructions for juicy boiled chicken legs
This method delivers perfectly moist chicken legs with crisp golden skin through precise seasoning and controlled cooking.
Prepare the Brine Solution
In a large pot, combine the 4 cups cold water, 0.25 cup diamond crystal kosher salt, and 2 tbsp granulated sugar. Stir until the salt and sugar dissolve completely—this creates the flavorful brine that ensures juicy meat. I like to use filtered water for the cleanest taste, but tap water works fine if you boil it first to remove chlorine.
Add the 2 whole fresh bay leaves, 4 whole fresh rosemary sprigs (woody stems removed), 2 whole fresh thyme sprigs (leaves only), 4 smashed garlic cloves, and 1 tbsp freshly cracked black peppercorns. Bring the mixture to a gentle simmer over medium heat for 5 minutes to infuse the aromatics into the liquid. This step extracts maximum flavor from the herbs and spices before they meet the chicken.
Season and Submerge the Chicken
While the brine simmers, pat the 1.5 lb chicken legs completely dry with paper towels—this helps the skin crisp properly. Rub each piece generously with 1 tbsp extra-virgin olive oil, focusing on the skin to create a barrier that locks in moisture as it cooks. The oil also promotes that coveted golden-brown finish.
Carefully lower the chicken legs into the simmering brine, ensuring they're fully submerged. If needed, use a plate to weigh them down. Return the heat to medium-low and maintain a gentle simmer—never a rolling boil, as this would toughen the meat. Cover the pot and cook for 30 minutes, checking occasionally to ensure the water level remains above the chicken.
Finish with Acid and Butter
After 30 minutes, remove the chicken legs and set them aside on a plate. Strain the broth through a fine-mesh sieve into a clean pot, discarding the herbs and spices. Return the strained broth to the pot and stir in the 2 tbsp lemon juice and 2 tbsp unsalted butter. Bring to a gentle simmer over low heat for 3-4 minutes until the butter melts completely and the liquid thickens slightly.
The acid from the lemon juice tenderizes the chicken further while brightening the flavor, and the butter adds richness that carries the aromatic broth. Taste the broth and adjust seasoning with additional salt if needed—this ensures the final dish is perfectly balanced even if you serve it with the cooking liquid.
Rest and Serve
Return the chicken legs to the pot with the finished broth and let them steep for 10 minutes off the heat. This resting period allows the meat to absorb any remaining flavorful liquid and ensures even moisture distribution. The skin should be tender and slightly crisp, while the meat remains juicy and tender throughout.
Serve the chicken legs immediately with the infused broth spooned over the top, or use the broth as a base for soups and sauces. For extra presentation, garnish with fresh herbs or a sprinkle of cracked black pepper. The result is chicken that's impossibly moist inside with perfectly crisp skin—a true test of balanced seasoning and gentle cooking technique.
Pro Tips For Making Boiled Chicken Legs
- Parboil First: Drop the chicken legs in a pot of cold water with salt and sugar, then bring to a boil. I learned this the hard way—starting with hot water makes the skin tough and uneven. The cold water ensures the meat cooks gently at first, keeping it juicy.
- Trim the Fat: Use kitchen shears to snip off any thick patches of skin or fat before boiling. It’s not just for looks—less fat means the broth stays clearer and the chicken absorbs more of that rosemary-bay flavor. (Yes, even if you’re impatient like me.)
- Don’t Crowd the Pot: Leave at least an inch of space between each leg when boiling. I used to jam them in, and they’d steam instead of simmer, turning out soggy. A tighter fit also traps heat, making the skin rubbery. Start with a smaller pot or cook in batches.
- Save the Broth: Strain the cooking liquid through a fine-mesh sieve and reduce it by half. That golden, herby broth is what turns this from boiled chicken to something special—great for gravy, rice, or even a quick sauce. (Your future self will thank you.)
Pro cooking tips for boiled chicken legs
Brine Temperature Control
Start your brine with cold water—never hot—because rapid temperature changes can shock the meat and cause it to toughen. I aim for a starting temperature of 60°F or lower, which helps the chicken absorb the brine evenly.
Use an instant-read thermometer to verify if you're unsure. The water should reach a gentle simmer (185-195°F) once the chicken is added, but never boil vigorously. 🌡️
Skin Crisping Hack
Pat the chicken legs bone-dry before oiling to maximize crispiness—this is non-negotiable. I use paper towels and press firmly to remove all moisture. After drying, rub the skin with 1 tbsp extra-virgin olive oil and let it sit for 5 minutes before boiling.
This creates a protective barrier that locks in moisture while promoting that golden finish. For extra crispiness, broil for 2 minutes after boiling if you're feeling ambitious.
Herb Infusion Trick
Simmer the herbs and spices in the brine for 5 minutes before adding the chicken to maximize flavor extraction. I also crush the peppercorns with the back of a knife for better dispersion.
This step ensures the aromatics fully infuse the liquid, which then penetrates the meat during cooking. If using dried herbs, add them directly to the pot with the chicken instead of pre-simmering.
Acid Finish Timing
The lemon juice and butter should be added only after the initial 30-minute cook, not at the start. This acid finish tenderizes the meat further while balancing flavors. I simmer the broth with these additions for just 3-4 minutes—any longer risks curdling the butter.
Taste the broth before serving; it should complement the chicken without overpowering it. 🍋
Resting for Juiciness
Never skip the 10-minute rest after cooking—this is where the magic happens. During this time, juices redistribute throughout the meat, ensuring every bite stays moist. I place the chicken on a wire rack set over a baking sheet to catch any drippings, then tent loosely with foil.
This also prevents the skin from steaming and becoming soggy. The result? Chicken that's impossibly tender and never dry.
Broth Reuse Secrets
The infused broth is just as valuable as the chicken—don't discard it! Strain and store it in an airtight container for up to 5 days in the fridge. Use it as a base for soups, gravies, or even rice dishes.
For extra richness, whisk in 1 tbsp cold butter or a splash of heavy cream before serving. This technique elevates simple boiled chicken into a restaurant-worthy meal with minimal effort. 💡
Nutrition facts
Frequently asked questions
Why does the recipe call for a gentle simmer instead of a rolling boil?
A rolling boil would toughen the chicken legs by drawing out moisture too quickly. The gentle simmer (185-195°F) keeps the meat tender while allowing the skin to become crisp. This method ensures juicy, flavorful results every time.
Can I use chicken thighs instead of drumsticks?
The recipe works perfectly with thighs or a mix of drumsticks and thighs. Just adjust the cooking time slightly—thighs may need 5-10 minutes extra since they have more fat and connective tissue. Use a meat thermometer to check for 165°F internal temperature.
What if my chicken skin isn't crispy after boiling?
Pat the chicken legs bone-dry before oiling and ensure you're using extra-virgin olive oil—this creates the crispy barrier. For extra crunch, broil for 2 minutes after boiling. If the skin is still soft, try adding 1/4 cup apple cider vinegar to the broth for a more tenderizing finish.
How do I store leftovers to keep them moist?
Store cooked chicken in an airtight container with a splash of the infused broth to maintain moisture. Reheat gently in the broth over low heat for 3-4 minutes—never microwave directly. Leftovers stay fresh for 4 days in the fridge or 3 months frozen.
Can I make this recipe in a slow cooker?
Yes! Use the same brine ingredients but cook on low for 3-4 hours instead of boiling. The slow cooker's gentle heat ensures tender meat without overcooking. Add the lemon juice and butter in the last 30 minutes to finish. This method is great for meal prep.