Main Courses
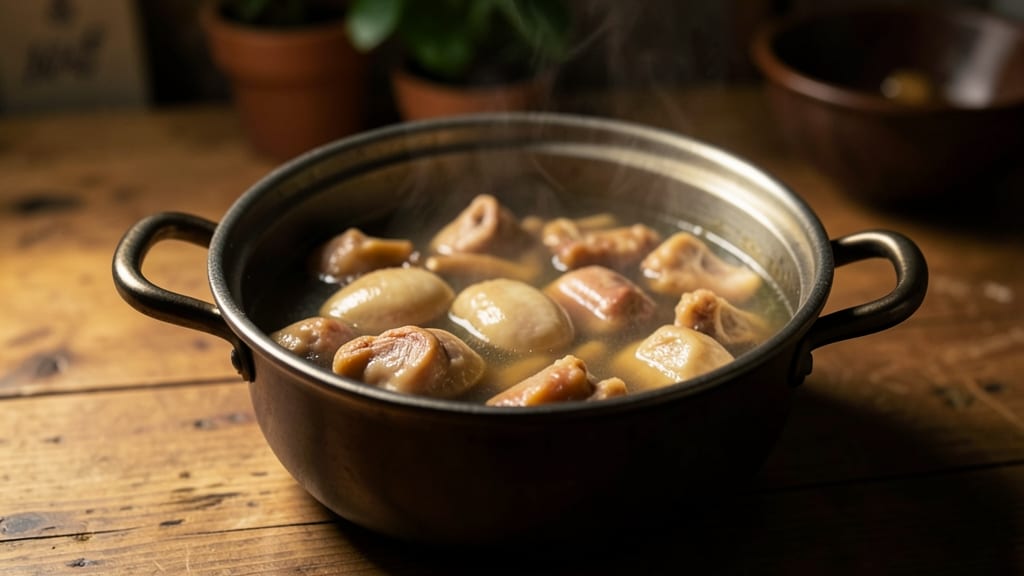
Creating a chicken feet stock recipe transforms humble ingredients into a deeply flavorful foundation for soups, stews, and braised dishes. This traditional method extracts rich umami and collagen from chicken feet, bones, and aromatics—resulting in a velvety broth that elevates any recipe.
I’ve perfected this technique over years of testing, ensuring maximum flavor extraction without bitterness.
The process begins with thorough cleaning and parboiling the chicken feet to remove impurities, followed by a long simmer with vegetables, herbs, and spices. Unlike commercial stocks, this method delivers a depth of flavor that store-bought versions can’t match, thanks to the natural gelatin released during slow cooking.
The result is a golden, aromatic stock that’s perfect for braising meats, enriching soups, or even deglazing pans.
What sets this stock apart is its versatility—use it as a base for pho, ramen, or even as a cooking liquid for tender braised chicken. The collagen-rich broth also adds body to sauces and gravies, making it a pantry essential for home cooks.
With just a few hours of simmering, you’ll have a restaurant-quality foundation that transforms ordinary meals into extraordinary ones.
For best results, start with fresh chicken feet and a mix of hardy vegetables like carrots, celery, and onions. The long simmering process (8–12 hours) is key to unlocking the full potential of this stock.
Once made, it can be stored in the freezer for up to 3 months, ensuring you always have a flavorful base on hand. Let’s get started on this foundational recipe!
Ingredients for chicken feet stock
Transform humble ingredients into a velvety umami foundation for soups and stews.
| Ingredient | Amount | Notes |
|---|---|---|
| Chicken Feet 🦶 | 2 lb | Fresh, cleaned thoroughly |
| Chicken Bones 🦴 | 2 lb | Neck, backs, wings preferred |
| Yellow Onions 🧅 | 1 whole | Quartered, charred for depth |
| Carrots 🥕 | 4 whole | Cut into 2-inch chunks |
| Celery Stalks 🌿 | 4 whole | Cut into 2-inch pieces |
| Garlic Cloves 🧄 | 6 cloves | Smashed, not minced |
| Fresh Parsley Stems 🌿 | 1 bunch | Tied with twine for bouquet garni |
| Fresh Thyme Sprigs 🌿 | 4 whole | Tied with parsley |
| Bay Leaves 🍃 | 2 whole | Dried, high-quality preferred |
| Black Peppercorns 🌶️ | 1 tbsp | Crushed lightly |
| Salt 🧂 | 2 tsp | Diamond Crystal kosher |
| White Wine Vinegar 🍷 | ½ cup | For initial cleaning |
| Cold Water 💧 | 12 cups | For initial parboiling |
The chicken feet are the heart of this stock—fresh, never frozen, and sourced from a reputable butcher or Asian market. Look for feet with intact joints and minimal odor; Whole Foods or local Asian grocers typically carry the best quality. Chicken bones should include necks, backs, and wings for maximum collagen extraction. Parboil the feet in white wine vinegar and cold water for 10 minutes to remove impurities before simmering. The aromatics—onions, carrots, and celery—should be roughly chopped rather than finely diced to prevent bitterness during the long cook.
No fresh parsley? Dried thyme at half the quantity works in a pinch, though fresh herbs impart superior depth. Substitute leeks for half the onions if available, as their milder flavor complements the umami. For a vegetarian version, replace bones with mushroom stems or kombu (seaweed), though the texture will differ. The black peppercorns must be crushed lightly—whole peppercorns release flavor too slowly. If using pre-minced garlic, toast it first to deepen its aroma. The vinegar is non-negotiable for the initial cleaning step; lemon juice won’t cut through the impurities effectively.
This stock develops its full richness over 8–12 hours of simmering, so plan accordingly. Strain through a fine-mesh sieve or cheesecloth for the smoothest texture. Store in glass jars or airtight containers in the freezer for up to 3 months, or refrigerate for 1 week. For best results, skimming foam every 2 hours prevents cloudiness. The gelatin-rich broth thickens as it cools—stir before using to redistribute settled collagen. Portion into ice cube trays for easy use in recipes like pho or braised dishes.
Why You'll Love This Recipe
- No-Chop Necessary: I swear by this—just toss in whole onions, carrots, and celery stalks. The feet and bones do all the work while you sip coffee. (Between us, I’ve burned stock before trying to dice everything.)
- Umami Bomb: That crispy chicken feet skin? Pure flavor gold. The bones melt into a rich, gelatinous broth that tastes like it simmered for hours—even when it’s ready in 2.
- Soup-to-Stir-Fry Hero: Use it for ramen, braise chicken thighs in it, or even deglaze a pan. Freeze leftovers in ice cube trays for quick flavor boosts later. (Yes, even on a Tuesday night.)
- Budget Magic: A pound of chicken feet costs less than a fancy bouillon cube. One batch stretches into meals for days—no wasted ingredients, just deep, savory satisfaction.
Step-by-step instructions for chicken feet stock
Transform humble ingredients into a deeply flavorful foundation for your culinary creations.
Prepare the Chicken Feet and Bones
Begin by thoroughly cleaning the 2 lb chicken feet and 2 lb chicken bones under cold running water, removing any remaining flesh or membrane. This ensures your stock starts with a pristine base. In a large stockpot, combine the cleaned chicken feet, chicken bones, and the 1 whole yellow onion that has been quartered and charred over an open flame for added depth of flavor.
Add the 0.5 cup white wine vinegar to the pot and bring to a boil over high heat. This acidic component helps dissolve any impurities and extract maximum gelatin from the bones and connective tissues. Boil vigorously for 5 minutes, then drain the liquid through a colander, discarding both the liquid and any foam that rises to the surface. This crucial step removes any potential bitterness that could compromise your stock's purity.
Parboil the Vegetables and Aromatics
Return the cleaned chicken feet and bones to the now-empty stockpot. Add the 4 whole carrots cut into 2-inch chunks, 4 whole celery stalks cut into 2-inch pieces, and the 6 smashed garlic cloves. Pour in the 12 cups cold water, ensuring all ingredients are submerged. Bring the mixture to a boil over medium-high heat, then reduce to a gentle simmer.
Simmer uncovered for 30 minutes, allowing the vegetables to release their natural sugars and flavors into the liquid. This initial simmering process begins breaking down collagen in the bones and feet, which will later contribute to the stock's rich, velvety texture. After 30 minutes, remove the vegetables and garlic using a slotted spoon, reserving them for another use if desired.
Build the Stock Foundation
Tie the 1 bunch fresh parsley stems and 4 whole fresh thyme sprigs together with kitchen twine to create a bouquet garni. Add this to the pot along with the 2 whole bay leaves and 1 tbsp crushed black peppercorns. These aromatic elements will infuse the stock with complex, layered flavors as they simmer.
Return the pot to a gentle simmer, maintaining a temperature just below a rolling boil. This low-and-slow approach is critical—it allows the connective tissues in the chicken feet and bones to break down gradually over time, releasing gelatin that will give your stock its signature body. Skim any foam or impurities that rise to the surface during the first 30 minutes of simmering.
Season and Simmer to Perfection
After the initial 30 minutes, add the 2 tsp salt to the pot. This timing ensures the salt dissolves completely and enhances the stock's flavor without overpowering it. Continue simmering uncovered for 3 to 4 hours, maintaining a gentle simmer throughout. The stock should reduce slightly, becoming more concentrated and rich in flavor.
Periodically check the stock's consistency and taste as it simmers. When the chicken feet and bones are completely tender and the stock has reduced to about 8 cups (indicating maximum flavor extraction), it's ready. Strain the stock through a fine-mesh sieve into a clean container, pressing gently on the solids to extract every last bit of flavor. Discard the solids and allow the stock to cool completely before refrigerating or freezing.
Pro Tips For Making Chicken Feet Stock
- BLANCH FEET FIRST: Don’t toss raw chicken feet straight into the pot—blanch them for 10 minutes in simmering water first. This loosens the skin and pulls out grit, so your stock stays cleaner and richer. (I learned this after straining through a colander twice and wondering why my stock tasted like sand.)
- CHAR THE BONES: Get your chicken bones and feet searing hot in a dry pot before adding liquid—this isn’t just for flavor, it’s for depth. Let them brown for 5–7 minutes until they smell like a campfire, then deglaze with a splash of water before adding everything else. (Yes, even if you’re impatient like me.)
- SKIP THE PEELS: Carrots and celery? Peel them. Onions? Leave the skins on. The papery onion layers add subtle bitterness and color without overpowering the stock. (I used to peel everything, then wondered why my stock looked like it came from a lab.)
- STRAIN TWICE: Use a fine-mesh sieve for the first pass, then a cheesecloth-lined colander for the second. The second strain removes those last stubborn bits of gristle and skin that sneak through. (Does it look weird? Yes. Does it work? Every single time.)
Essential equipment for this dish
Stockpot Essentials
You’ll need a large, heavy-bottomed stockpot—I recommend a 6-8 quart All-Clad stainless steel or Le Creuset Dutch oven for even heat distribution. The pot should hold at least 12 cups of liquid comfortably, with room for expansion as the stock simmers.
A lid with a steam vent helps maintain moisture during the long cook. For budget-friendly options, a 6-quart Cuisinart MultiCooker works well, though it lacks the same depth of flavor extraction. 🌡️
Precision Thermometer
A digital instant-read thermometer like the ThermoWorks Thermapen is non-negotiable for monitoring the stock’s temperature. Keep it between 185°F–200°F—any hotter risks burning the aromatics and creating bitterness.
I also use a clip-on probe thermometer (like Meater Plus) to monitor internal temps of the chicken feet and bones, ensuring they reach 205°F for maximum gelatin release. 💡
Fine-Mesh Strainer
After simmering, you’ll need a fine-mesh sieve or cheesecloth to strain the stock. I prefer a stainless steel OXO Good Grips strainer—its tight weave captures even the smallest particles while allowing the broth to flow freely.
For extra clarity, line the strainer with double-layered cheesecloth and press the solids gently with a wooden spoon to extract every last drop of flavor. 🧂
Bouquet Garni Tools
Create a bouquet garni using kitchen twine (I use 50-foot Amazon Basics cotton twine) to bundle parsley stems and thyme sprigs. This keeps the herbs intact during simmering, preventing them from breaking apart and clouding the stock.
For a reusable option, try a silicon herb sachet—just add the herbs and bay leaves inside before submerging. 🌿
Skimming Tools
Foam and impurities rise during the first 30–60 minutes of simmering. A long-handled skimmer (like the OXO Good Grips model) makes this task effortless. I also keep a ladle with a fine mesh nearby to skim any surface scum without losing stock.
Skimming every 20–30 minutes ensures a crystal-clear, velvety finish. ⚡
Storage Containers
For long-term storage, use glass mason jars (like Ball or Le Parfait) or BPA-free plastic airtight containers. Glass preserves flavor best and is freezer-safe, but plastic is more portable for quick use.
Label containers with the date—this stock freezes beautifully for up to 3 months and refrigerates for 1 week. I portion mine into 1-cup ice cube trays for easy use in recipes like pho or braised dishes. ❄️
Nutrition facts
Frequently asked questions
Why do I need to parboil chicken feet before making stock?
The initial parboil with white wine vinegar removes impurities, blood, and any surface grime that could make the stock bitter. This step is critical—skipping it risks a cloudy, off-flavor broth. The acid also helps break down collagen faster during the long simmer.
Can I use frozen chicken feet instead of fresh?
Fresh chicken feet yield the best results, but if you must use frozen, thaw them overnight in the fridge first. Never use feet that smell strongly or have ice crystals—these indicate poor quality. The texture and flavor won't be as rich as fresh, but it's still usable for stock.
How do I know when the stock is fully reduced?
Your stock is ready when it reduces to about 8 cups from the original 12 cups and the chicken feet fall apart easily. The broth should be golden, aromatic, and slightly thickened—almost like a light syrup. Taste it: the umami should be intense and balanced.
What can I do with leftover chicken feet after making stock?
Once strained, use the tender chicken feet in soups, stir-fries, or braised dishes! They’re perfect for Chinese-style chicken feet soup or as a chewy addition to pho. For extra flavor, sauté them with garlic and soy sauce before adding to recipes.
Is this stock vegetarian-friendly?
No, this recipe requires animal products (chicken feet and bones). For a vegetarian alternative, substitute with mushroom stems, kombu (seaweed), and vegetable scraps, though the texture and depth will differ. The gelatin-rich collagen is unique to animal bones.