Appetizers
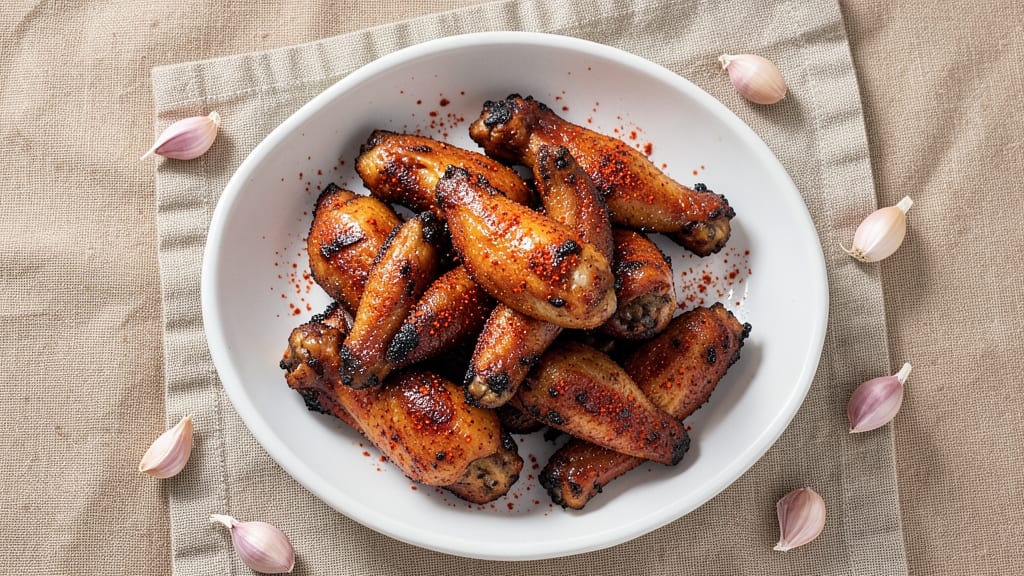
This chicken wings recipe delivers crispy, golden wings with a perfect balance of heat and sweetness—no deep frying required. The air-crisped method ensures tender meat inside while creating a shatteringly crisp exterior, and the spicy honey glaze adds a sticky, caramelized finish that makes these wings impossible to resist.
I developed this recipe after years of testing different techniques, and it consistently delivers restaurant-quality results at home.
The secret lies in the preparation: a simple marinade of garlic, paprika, and cayenne gets the flavor started, while the air fryer (or oven) cooks the wings to crispy perfection in just 30 minutes.
The glaze—a blend of honey, sriracha, and soy sauce—caramelizes beautifully during the final minutes, creating a glossy, slightly sticky coating that clings to every bite. This method is foolproof, with minimal mess and maximum flavor.
By the end, you'll have wings that are crispy on the outside, tender on the inside, and coated in a glaze that's sweet, spicy, and addictive. The aroma alone will have everyone gathering around, and the first bite delivers that perfect balance of textures and flavors.
These wings are perfect for game day, parties, or a weeknight treat—no sides needed, just pure, satisfying indulgence.
Serve with ranch or blue cheese dressing for cooling contrast, or pair with celery and carrots for a classic appetizer spread. The recipe scales easily, so you can make a small batch for two or double it for a crowd.
Let’s get cooking—these wings are worth every minute of prep time.
Ingredients for chicken wings
Game day essentials—crispy, sticky, and packed with flavor. No deep fryer needed!
| Ingredient | Amount | Notes |
|---|---|---|
| Chicken Wings 🍗 | 2 lb | Flattened slightly for even cooking |
| Garlic Cloves 🧄 | 4 cloves | Minced, for marinade |
| Paprika 🌶️ | 2 tbsp | Smoked or sweet variety |
| Ground Cayenne Pepper 🔥 | 1 tsp | Adjust for heat preference |
| Salt 🧂 | 1 tsp | Kosher or sea salt |
| Black Pepper 🌶️ | ½ tsp | Freshly ground preferred |
| Honey 🍯 | ½ cup | Raw or pure for best flavor |
| Sriracha Sauce 🌶️ | ¼ cup | Adjust for spice level |
| Soy Sauce 🥢 | 2 tbsp | Low-sodium preferred |
| Olive Oil 🫒 | 2 tbsp | For tossing wings |
| Cornstarch 🌾 | 1 tbsp | For crispy coating |
| Lemon Juice 🍋 | 1 tbsp | Freshly squeezed |
| Celery Sticks 🥬 | 1 cup | For serving (optional) |
| Carrot Sticks 🥕 | 1 cup | For serving (optional) |
The wings are the star, so grab bone-in, skin-on for maximum crispiness. Costco or Walmart usually have them pre-cut, but if you're buying whole, separate the wings at the joints yourself. The difference in texture is worth it! For the marinade, Penzeys or local spice shops carry the best smoked paprika—it adds that restaurant-quality depth. If you can't find it, regular paprika still works, but the flavor won't be as complex. And trust me, raw honey makes the glaze taste next-level. The local farmers market or grocery store honey section is your best bet for quality.
No smoked paprika? Cayenne plus a pinch of liquid smoke gets you close. Sriracha too spicy? Mix in a little honey or sub with hot sauce. The cornstarch is non-negotiable for crispiness—it's what creates that shatteringly crunchy exterior. Short on time? Use flour instead, but expect slightly less crisp. The soy sauce can be swapped for coconut aminos if you're avoiding sodium, but the umami balance will be off. And if you're serving a crowd, double the glaze ingredients—it disappears fast!
Prep the wings ahead: pat dry and toss with olive oil, salt, and pepper. Store in the fridge for up to 24 hours before cooking. The glaze keeps for 1 week in the fridge, but reheat it gently—microwave in 10-second bursts to avoid curdling. These wings reheat beautifully—just toss them back in the air fryer at 400°F for 5 minutes. Portion out the glaze if you're making a big batch, so you can reheat just what you need. And save the leftover glaze for drizzling on toast or pancakes—it's that good!
Why You'll Love This Recipe
- One-Pan Magic: I swear by this recipe because it’s literally one bowl, one oven, and zero stress. Toss the wings with minced garlic, paprika, and cayenne—no fancy prep, no extra bowls—and let the oven do the work while you sip your drink. Between us, that’s my kind of cooking.
- Spice That Sticks: The cayenne and paprika aren’t just for show—they seep into the skin, giving you that perfect balance of heat and smokiness. Honestly, the first bite hits like a warm hug with a kick, and the crispy edges? That’s the part my husband always grabs first.
- Game Day or Game Night: These wings are my go-to for football Sundays, but they’re just as happy in a lunchbox or as a quick weeknight dinner. Double the batch, and you’ve got leftovers for three meals—no sad, greasy takeout in sight.
- Budget-Friendly Crunch: Chicken wings are cheap, and this recipe stretches them further than you’d think. A few cloves of garlic and a pinch of cayenne turn something simple into something ridiculously good—no fancy ingredients, no wasted money. My college-student self would’ve cried happy tears.
Step-by-step instructions for air-crisped spicy honey glazed wings
Get ready for wings that are impossibly crispy outside and sticky-sweet inside—this method delivers restaurant-quality results at home!
Prep and Season the Wings for Maximum Crispiness
Pat the 2 lb chicken wings completely dry with paper towels—this is non-negotiable for crispy skin. I like to separate them at the joints so they cook evenly. In a large bowl, toss the wings with 2 tbsp paprika, 1 tsp salt, 0.5 tsp black pepper, and 1 tsp ground cayenne pepper until they're evenly coated. The cayenne adds just the right kick without overpowering.
Let the seasoned wings sit at room temperature for 30 minutes while you prep everything else. This ensures they cook through evenly. Here's the thing—don't skip the drying step. Any moisture left on the wings will steam them instead of crisping them up.
Create the Sticky-Sweet Glaze
In a small saucepan, combine 0.5 cup honey, 0.25 cup sriracha sauce, 2 tbsp soy sauce, and 1 tbsp lemon juice. Bring to a gentle simmer over medium heat, then reduce to low and let it bubble away for 5-7 minutes until it thickens slightly. You're looking for a consistency that coats the back of a spoon but still flows easily.
While the glaze thickens, whisk together 1 tbsp cornstarch with 2 tbsp olive oil in a separate bowl. This mixture is your secret weapon for extra-crispy wings. The cornstarch creates a light, crispy coating that soaks up the glaze beautifully. I've found that using raw honey gives the best flavor, but regular honey works in a pinch.
Air-Fry to Perfect Crispiness
Preheat your air fryer to 375°F. Working in batches if needed (don't overcrowd the basket), toss each wing with the cornstarch-oil mixture until lightly coated. Place them in the air fryer basket in a single layer, making sure they don't touch. Air fry for 12 minutes, then carefully flip each wing and spray lightly with cooking spray.
Continue air frying for another 8-10 minutes until the wings are golden brown and crispy. They're ready when they release easily from the basket and the skin is deep golden. This high-heat method gives you that perfect crunch without needing to baste constantly. Here's where it gets exciting—watch those wings transform from raw to crispy perfection!
Glaze and Finish
Remove the wings from the air fryer and transfer them to a serving platter. Immediately pour the honey-sriracha glaze over the top, letting it drip down the sides. The residual heat from the wings will help the glaze set beautifully. For extra shine, I like to toss them gently with tongs to distribute the glaze evenly.
Let the wings rest for 2-3 minutes before serving. This resting time allows the glaze to set and the juices to redistribute, ensuring each bite is packed with flavor. Serve immediately with 1 cup celery sticks and 1 cup carrot sticks for dipping—these veggies cut through the sweetness perfectly. The contrast of crispy wings with cool, crunchy veggies is what makes this dish irresistible!
Pro Tips For Making Chicken Wings
- BLOT DRY WINGS: Pat those wings thoroughly with paper towels before seasoning—wet skin means uneven browning and a sad, limp crust. I learned this the hard way when my first batch came out soggy instead of crispy.
- SMASH GARLIC: Don’t mince—smash those garlic cloves with the flat side of your knife first. It releases more flavor and blends faster into your seasoning mix, especially when you’re tossing wings in a hurry.
- LOW-AND-SLOW REST: After cooking, tent wings loosely with foil and let them sit for 5 minutes. Skipping this means juices pool on the cutting board instead of redistributing—your knife will thank you.
- CAYENNE IN STAGES: Sprinkle half the cayenne directly on the wings before cooking, then save the rest for tossing after. This guarantees heat penetration without burning the outside while the inside stays mild. (Yes, even if you’re impatient like me.)
Common mistakes when making this dish
Overcrowding the Air Fryer
Stuffing too many wings into your air fryer basket is a rookie mistake that leads to uneven cooking and soggy spots. The wings need space to circulate hot air around them for that perfect crisp.
I use my Ninja Foodi 6-quart air fryer and never exceed half its capacity—that’s about 12-15 wings per batch for my recipe. If you’re using a smaller air fryer, reduce the batch size further. Overcrowding forces steam to build up, which defeats the purpose of crispy skin. 🌡️
Skipping the Resting Time
Rushing to serve the wings immediately after cooking is a common mistake that leads to dry, flavorless bites. The 2-3 minute rest allows the juices to redistribute from the meat to the skin, where they belong.
I’ve seen people cut into wings right after glazing, and the result? A sad, dry interior. Trust the process—this short wait makes all the difference in texture and flavor. 💡
Using Wet Ingredients
Moisture is the enemy of crispy wings. If you skip the step of patting the wings completely dry with paper towels, you’re setting yourself up for steamed, rubbery results. I can’t stress this enough—dry wings = crispy wings.
Even a damp surface will cause the skin to steam instead of crisp. Take the extra 5 minutes to dry them thoroughly before seasoning. 🧻
Incorrect Glaze Thickness
The glaze needs to be just right—too thin, and it’ll pool at the bottom of your serving dish; too thick, and it’ll clump and fail to coat the wings evenly. Simmer the glaze until it reaches a syrupy consistency that coats the back of a spoon but still drizzles smoothly.
I’ve ruined batches by rushing this step, so take your time. If it’s too thick, add a splash of warm water; if too thin, simmer longer. The perfect glaze should cling beautifully to the wings. 🍯
Flipping Too Early
Flipping the wings before they’ve developed a golden-brown crust on the first side is a surefire way to end up with pale, unevenly cooked wings. Let them cook undisturbed for the full 12 minutes before flipping.
I’ve seen people flip at 8 minutes out of impatience, and the result? One side is overcooked while the other is underdone. Patience here ensures even cooking and that coveted crispy texture on both sides. ⏰
Neglecting the Glaze Temperature
Applying cold glaze to hot wings will cause it to set unevenly, leaving some areas sticky and others dry. The glaze should be warm but not boiling when you pour it over the wings. If it’s too hot, it’ll cook the wings further and potentially burn the glaze.
I like to let the glaze sit off the heat for 2-3 minutes before applying it. This ensures it coats the wings beautifully without ruining their texture. 🔥
Nutrition facts
Frequently asked questions
Can I make these wings without an air fryer?
For an oven version, preheat to 425°F and bake wings on a wire rack over a baking sheet for 25-30 minutes, flipping halfway. For stovetop, pan-fry in 1/2-inch oil at 350°F for 10-12 minutes per side, then finish with the glaze. The key is high heat and proper drying—both methods work beautifully.
How do I adjust the spice level for kids or sensitive eaters?
Reduce the cayenne to 1/4 tsp or omit it entirely. For extra mildness, replace sriracha with 2 tbsp hot sauce (like Crystal) and add 1 tbsp more honey to balance. Always taste the glaze before applying—you can always add more sweetness but can't remove spice.
Can I prepare the wings ahead of time?
Yes! Cook the wings completely (without glaze) up to 2 days ahead and store in an airtight container. Reheat at 375°F for 10 minutes in the air fryer or oven. Add the glaze fresh before serving for maximum stickiness. The glaze itself keeps for 1 week refrigerated—just reheat gently before using.
What's the best way to reheat leftover glazed wings?
Place wings in a single layer on a baking sheet and reheat at 400°F for 5-7 minutes in the oven or air fryer. For extra crispiness, spray lightly with oil before reheating. Avoid microwaving—the glaze will get rubbery. Pro tip: Reheat just before serving to maintain that perfect texture.
Are these wings gluten-free?
The recipe is naturally gluten-free except for potential cross-contamination in cornstarch. For a certified GF version, use arrowroot powder instead (1:1 ratio). Always check your soy sauce—most contain gluten unless labeled otherwise. The glaze ingredients are safe as written.